How to share a mouse and keyboard between Macs and iPads
Universal Control has been the one macOS Monterey feature that we have been most excited about ever since Apple first announced it in June 2021. Nine months later and Universal Control has just arrived on the Mac or iPad.
What is Universal Control?
Universal Control is one of eight features that were missing at the launch of macOS Monterey and iOS 15.
Universal Control will let you use the same keyboard and mouse for all the Macs and iPads you are working on. All you have to do to switch devices is move the pointer until it crosses the edge of the screen. The new feature also makes it extremely easy to copy content between devices using drag-and-drop.
Universal Control builds on the Continuity features Apple added years ago that made it easy to move from one device to another seamlessly. Then with Catalina in 2019 came Sidecar, which made it easy to use an iPad as an additional screen for your Mac. Read: How to use an iPad as a second screen with a Mac.
But Universal Control goes a step further than Sidecar did: rather than turning your iPad display into a secondary Mac display, Universal Control will maintain the iPadOS on the iPad,so that you can interface with the iPad as an iPad, rather than as a second screen for your Mac.
Similarly, Universal Control brings a Sidecar like feature to the Mac, so you can extend the primary screen to the secondary Mac, but you can also choose to use the two Macs independently so that you can interface between the two devices.
We explain how to use a keyboard and mouse with two Macs or a Mac and an iPad, and how to use a second Mac as an extra display for your primary Mac. Read on!
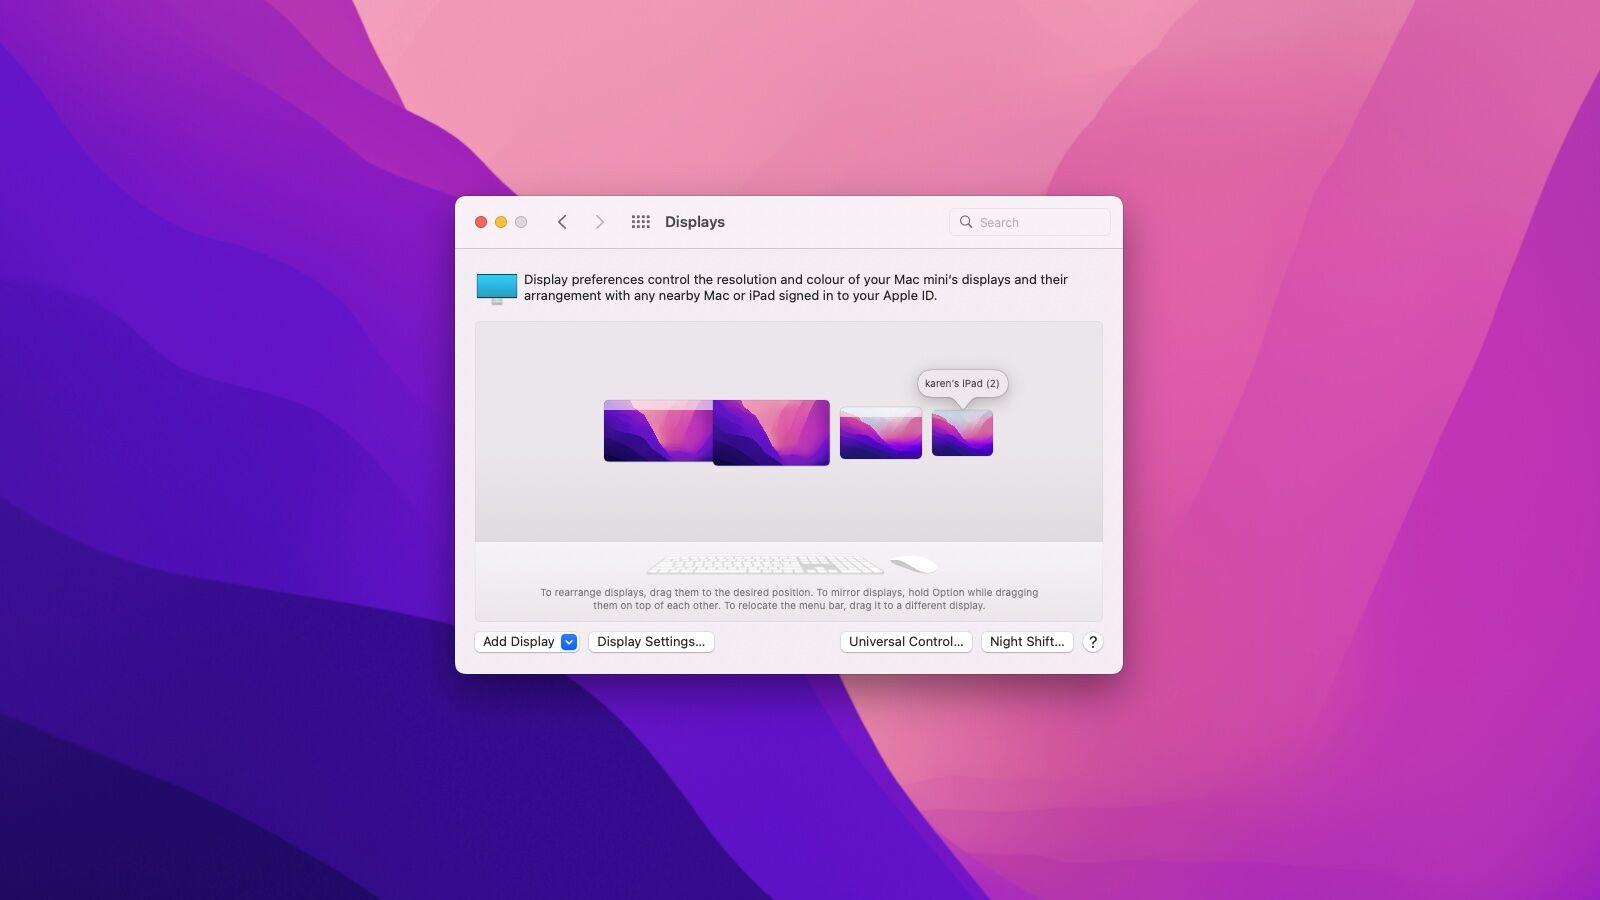

What you need for Universal Control
Universal Control is turned on by default on both your Mac and iPad, but you do need to set up a few things.
- Universal Control arrived on 14 March 2022 in macOS 12.3 or iPadOS 15.4 . In order for Universal Control to work you will need macOS 12.3 on your Mac(s) and iPadOS 15.4 on your iPad.
- You will need a compatible Mac(s) and iPad (see compatibility list below).
- You also need Bluetooth and Wi-Fi to be turned on on your Mac and iPad so make sure that they are all on.
- You’ll also need to be signed into the same iCloud account on both devices.
- You’ll also need to move your iPad or secondary Mac within 10 meters (30 feet) of your Mac.
Universal Control compatibility
Universal Control won’t work with every Mac or iPad. If you want to operate multiple Macs and iPads with one keyboard, mouse and trackpad you’ll need a recent Mac and a recent iPad, both devices will need to be logged into the same Apple ID, you will also need two-factor authentication, and you will need to be running macOS 12.3 or iPadOS 15.4.
Your devices need to be within 10 meters of each other and on the same WiFi network.
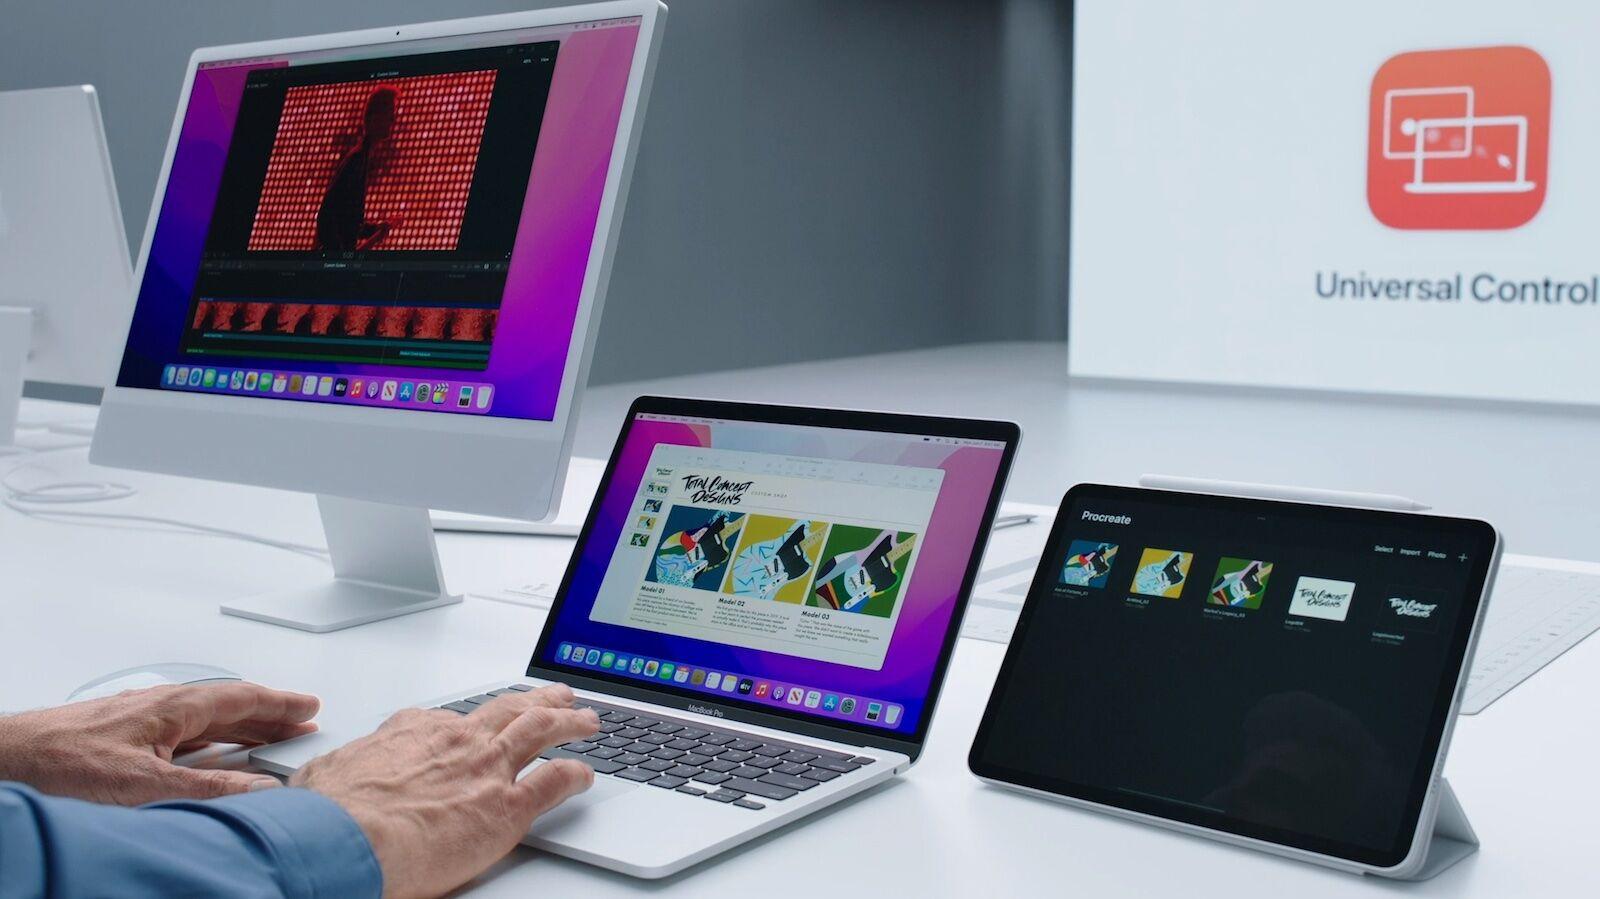

Compatible Macs include:
- MacBook Pro (2016 and later)
- MacBook (2016 and later)
- MacBook Air (2018 and later)
- 21.5in iMac (2017 and later)
- 27in iMac (2015 and later)
- 24in iMac
- iMac Pro
- Mac mini (2018 and later)
- Mac Pro (2019)
Compatible iPads include:
- iPad Pro
- iPad Air (3rd generation and later)
- iPad (6th generation and later)
- iPad mini (5th generation and later)
This means that if your Mac is from 2015 or earlier it’s not a feature you will be able to enjoy (unless you have a 27in iMac from that era).
Does Universal control work with Intel Macs?
Universal Control will work with some recent Intel Macs.
Does universal control work with iPhone?
Universal Control only connects the Mac and iPad, not the iPhone. The iPhone isn’t really suitable for use as an additional screen in this sort of set up.
How many devices can you link with Universal Control?
Up to three Macs or iPads can be linked this way. But you will need a Mac in order to use this with an iPad – you can’t use Universal Control to link two iPads (yet, anyway).
How to share a mouse and keyboard with two Macs
If you want to use your keyboard and mouse with two Macs follow these steps:
- Open System Preferences on your Mac and select Displays.
- Click on Universal Control.
- Check/tick all three boxes: ‘Allow your cursor and keyboard to move between any nearby Mac or iPad’ (that’s signed into your iCloud account). ‘Push through the edge of a display to connect to a nearby Mac or iPad’. And ‘Automatically reconnect to any nearby Mac or iPad’ which will ensure that your Mac and iPad reconnect next time.
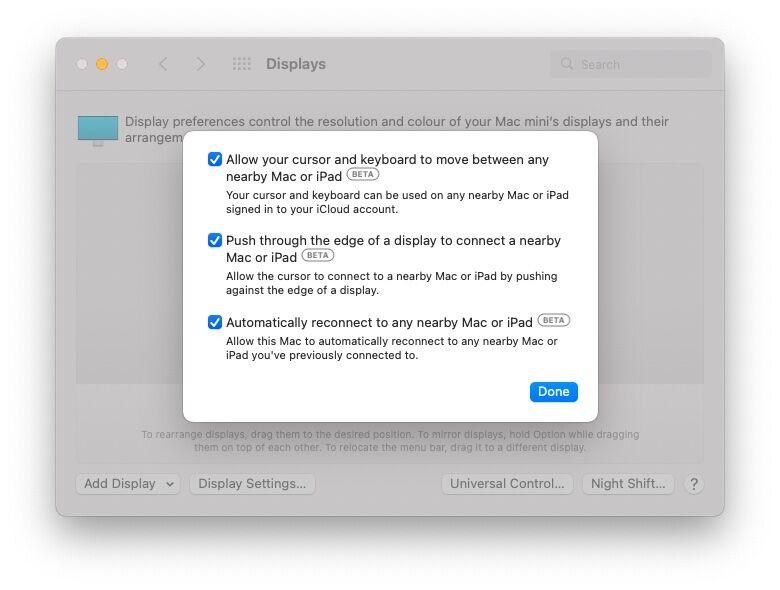

- Go to the other Mac and select all three option in System Preferences > Displays > Universal Control. (If you don’t do this you won’t see the option to Link Keyboard and Mouse under Add Display in the next step.)
- Click on the drop down beside Add Display. You’ll see the option Link Keyboard and Mouse and the name of your secondary Mac underneath.
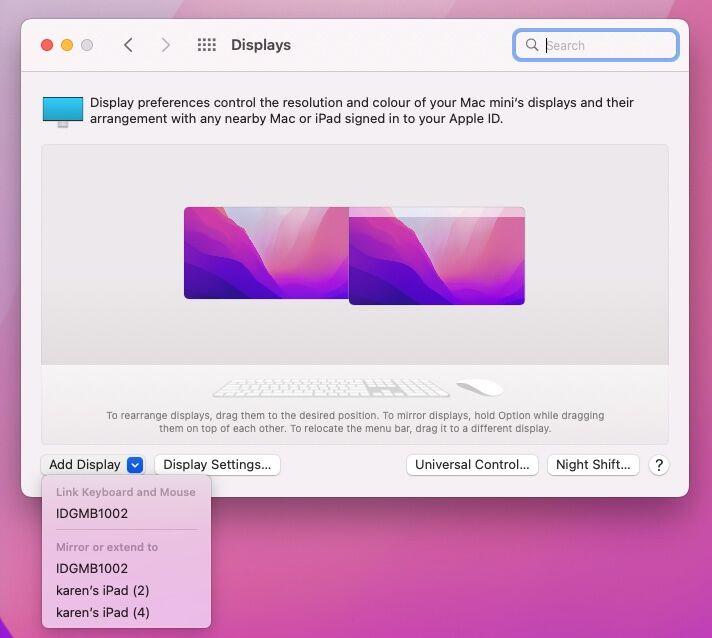

- Now drag your mouse to the second Mac and you will see the cursor appear on that screen. Click on a document and you’ll be able to type with the keyboard.
- Drag the displays into a location that matches the set up on your desk so that you can find each display.
Now when you drag your cursor over in the direction of your secondary Mac screen, when you get the the edge of the screen your cursor will move to the other screen and you will be able to use your keyboard and mouse to control the secondary device.
So for example if you want to use FaceTime on your MacBook you can still use the mouse and keyboard usually associated with your Mac mini. You are using the FaceTime app on the MacBook not the Mac mini.
How to use a second Mac as an extended display
If you just want to use the display as an extra display here’s what to do:
- Open System Preferences on your Mac and select Displays.
- Click on Add Display. You’ll see the names of your secondary Mac or iPad .
- Select your iPad or the secondary Mac.
- If the display settings don’t suit you (the test on our displays went really small) click on Display Settings and select the monitor that you want to use as the default in the column on the left.
- If you find that your displays are mirrored and would prefer the displays to be extended, click on the drop down box beside Use as: and rather than Main display choose Stop mirroring.
- If you find the display on your secondary Mac is the wrong resolution select Scaled and then choose an option that seems best.
This is a little like the way Sidecar works when you share an iPad screen with a Mac. The display of your primary Mac is extended onto the display of your secondary Mac – you can’t access your secondary Mac.
If you are hoping that it will be a way to use an old iMac display with your new Mac then be prepared to be disappointed – the feature most likely won’t be compatible unless your iMac is one of those mentioned in the compatibility list above (2015 or 2017 and later depending on the size).
How to share your mouse and keyboard with an iPad
On your iPad follow these steps:
- Go to Settings > General
- Go to AirPlay & Handoff
- Make sure Cursor & Keyboard is selected.
Now on your Mac follow these steps:
- Open System Preferences > Displays.
- Click on Add Display.
- Under Link Keyboard and Mouse you should see your iPad.
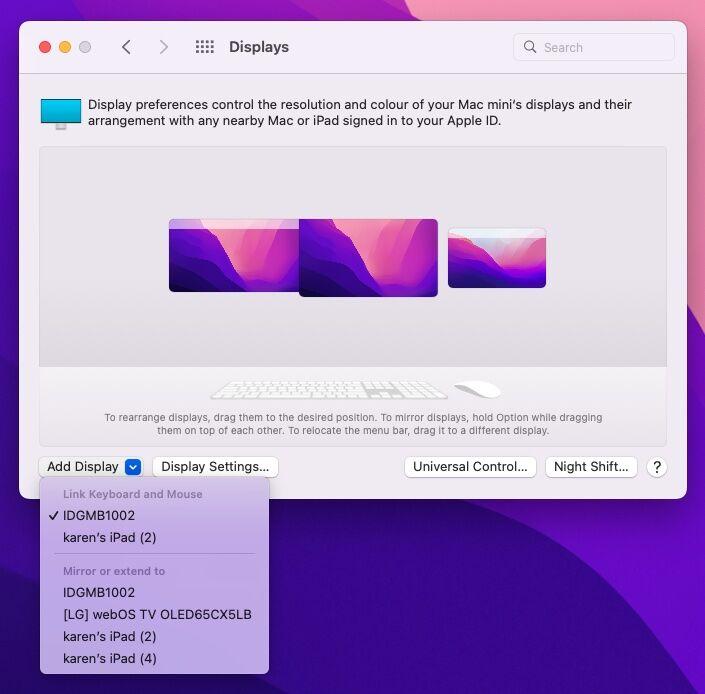

- Select your iPad (If it disappears just unlock your iPad or wake it up!)
- You can click on the screens in the window (as seen above) and move them to a position that matches the set up on your desk so that you can easily find them!
Note that when we used the Home button on our iPad it stopped Universal Control, so if you do that you may need to start it again in System Preferences > Displays.
How to use your iPad as a extra display for your Mac
This feature is really Sidecar, which is a feature that’s been around for a few years now.
This feature is different to Universal Control because you can’t use your iPad as an iPad when it is in that mode, it’s just a screen for your Mac showing the Mac interface.
To use your iPad this way follow these steps:
- On your Mac go to System Preferences > Displays.
- Click on Add Display.
- You should see your iPad in the list of possible displays to “mirror or extend to”. Click on it.
- Now your iPad display will show an extended screen for your Mac.
- If you want to mirror your Mac screen click on the iPad in the column on the left side of the Display Settings window and switch from Use as Extended display to Use as Main Display
- Your Mac display will now appear on the iPad.
We explain how to use your iPad as a second screen with Sidecar in a separate article.
How to drag and drop between Mac and iPad
While it was already possible to copy and paste text between your Apple devices thanks to Universal Clipboard, it’s now really easy to drag and drop files and other things between your iPad and Mac and vice versa. The same is true if you want to drag and drop between two Macs (without having to go via AirDrop).
How to drag a file or photo from Mac to iPad
Prior to Universal Control if you wanted to copy a file or photo to an iPad from a Mac (or vice versa) you could use AirDrop (see: How to AirDrop on Mac, iPhone and iPad), you could Message or Email from one device to the other, or you could save to iCloud where you could access it on either device, for example anything saved to your Desktop can be accessed on any of your Apple devices if you subscribe to iCloud+ (see: How to iCloud Drive to sync files between Mac, iPhone and iPad).
Now Universal Control has arrived it’s easy to drag and drop to from the Mac to iPad, but you do have to show the file where it needs to go on the iPad (it won’t automatically got the correct place).
For example, if you want to copy a photo from your Mac to your iPad follow these steps:
- Open Photos on your iPad.
- Click on the photo on your Mac.
- Drag it from your Mac screen to the iPad.
- Drop the photo into the Photos app (if doesn’t seem to work if you just drop onto the Photos icon, you need the app to be open.)
On the other hand if you want to drag from the iPad to the Mac the process is a lot easier, just drag and drop to the desktop and it will end up there (and if you have Stacks selected it will be in the relevant folder). Read: Clean up a Mac desktop with Mojave Desktop Stacks & other tricks.
Alternatively drag it to a folder and drop it there.


Comments are closed, but trackbacks and pingbacks are open.