How to make a video slideshow on your iPhone using Photos
There is more than one way to edit videos recorded on your iPhone to make a movie to share with friends and family, but one of our favouites is using the Memories feature in Photos.
However, despite Apple’s usual tendency to make features easy to use and discover, it has to be said that Memories is one of the best hidden tools on the iPhone and iPad.
This is partly because Apple just wants to do everything for you. Without you even asking Photos will take a collection of photos and videos and present you with a beautifully edited video montage. Except that most of the time our montages were spoiled by a screen shot of a bus timetable taken on the same day, or a video clip that showed a baby crying rather than laughing.
In this article we will look at:
Luckily it is possible to edit and finesse your iPhone Memories to make something you’d be proud to share on Facebook. Here’s how.
How to edit Memories in Photos
Memories are montages that combine your photos and videos. You could use the feature to make a video and photo montage of a holiday, or just add photos to make a beautiful slideshow that you can share with family and friends. Here’s how to choose the photos and video clips you want to appear.
- Open Photos
- Gather the images and videos you wish to be include into an Album (tap Select, tap on all the images and video you want to include, tap on Add To, Tap New Album, Choose a name and Tap Save).
- Go to the Albums view and find the Album you just created. (Tap on Albums, bottom left of the menu).
- In iOS 14 tap on the … in the top right (Tap on the > beside your Album name in older iOS versions)
- In iOS 14 this takes you to a collection of options for sharing. Tap on Play Memory Movie. (In earlier versions this will take you straight to the Memory that Apple has compiled for you.)
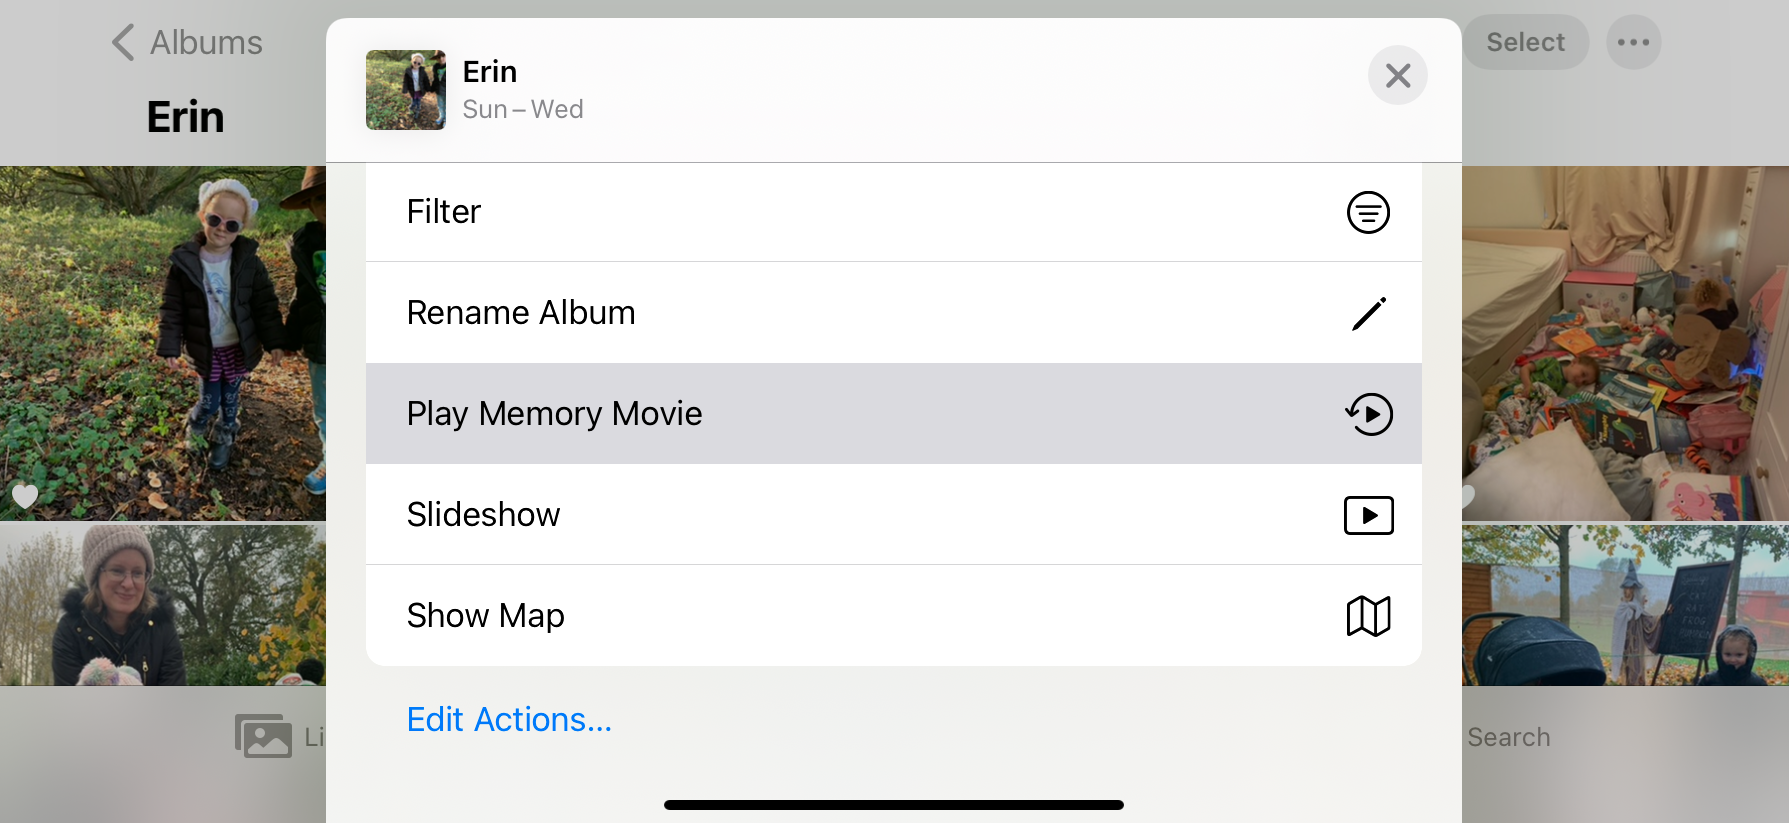
- When you tap the Play icon your movie will start to play – but you can change the images and movies included, which you may want to do if you find that not all the images and video you selected are included or if you don’t like the music that plays.
- To edit your Memory tap on Edit in the top right corner, you will see a Dialog box asking you to add the memory to Memories. Tap OK.
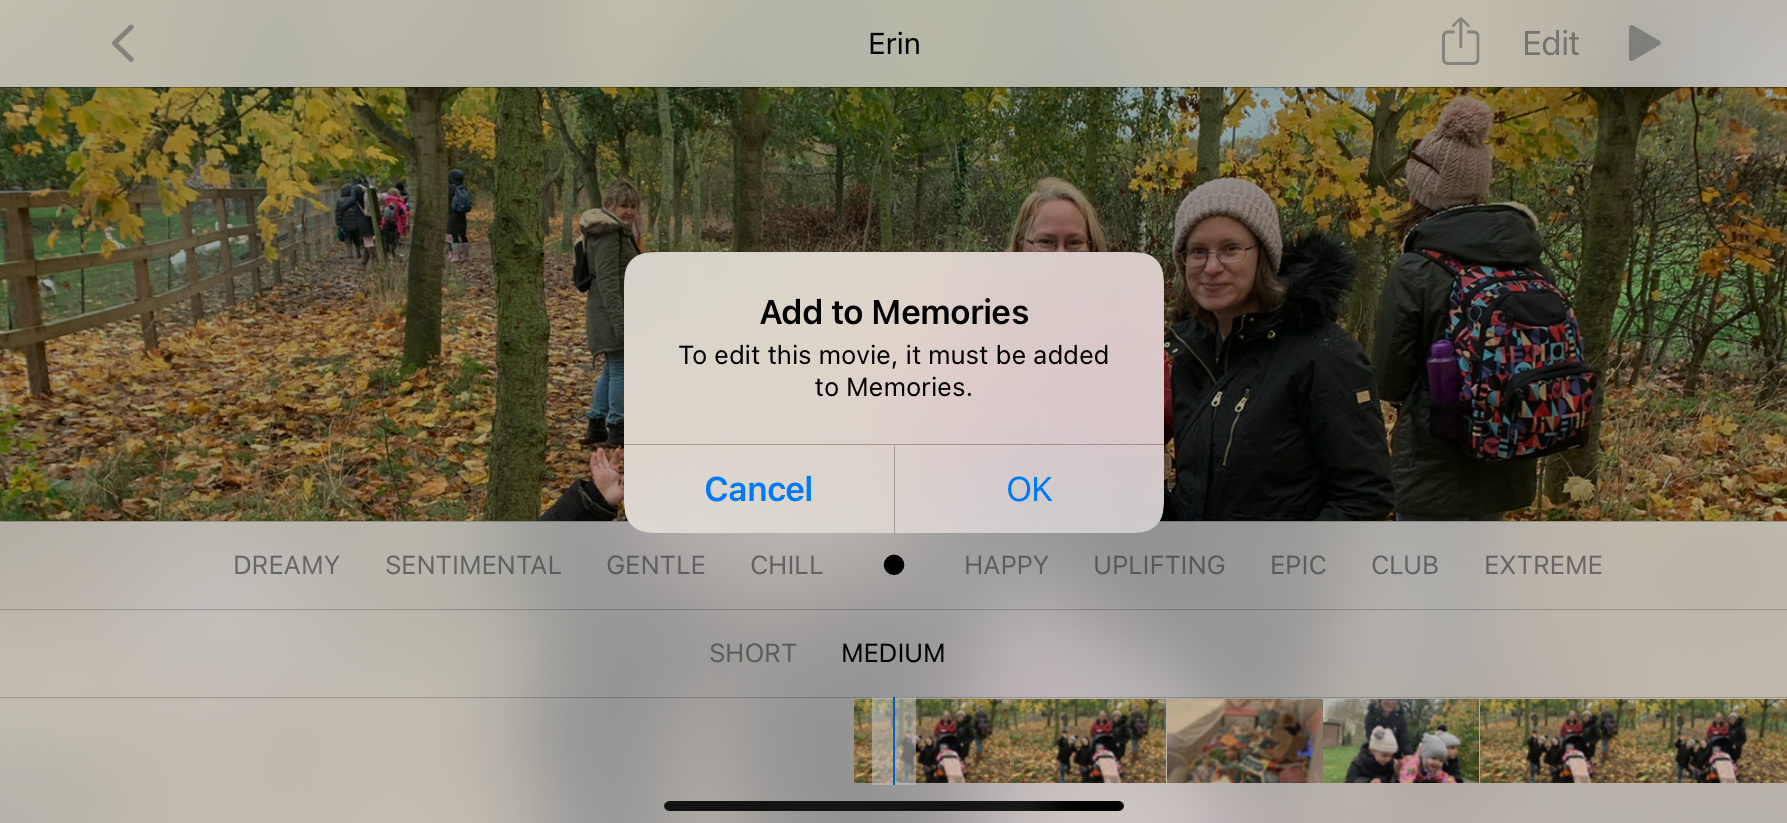
- The next screen gives you options to edit the Title, Title Image, Music, Duration, and Photos & Videos.
- You could tap on Duration to increase the duration – this may mean that more of your videos and photos are included in your Memory. However, we’d suggest that if you want to be able to tweak things yourself then you should go straight to Photos & Videos.
- Tap on Photos & Videos. The next screen will show you the photos and video currently included in the Memory. However, this is likely to not be all the photos and videos you added to the album.
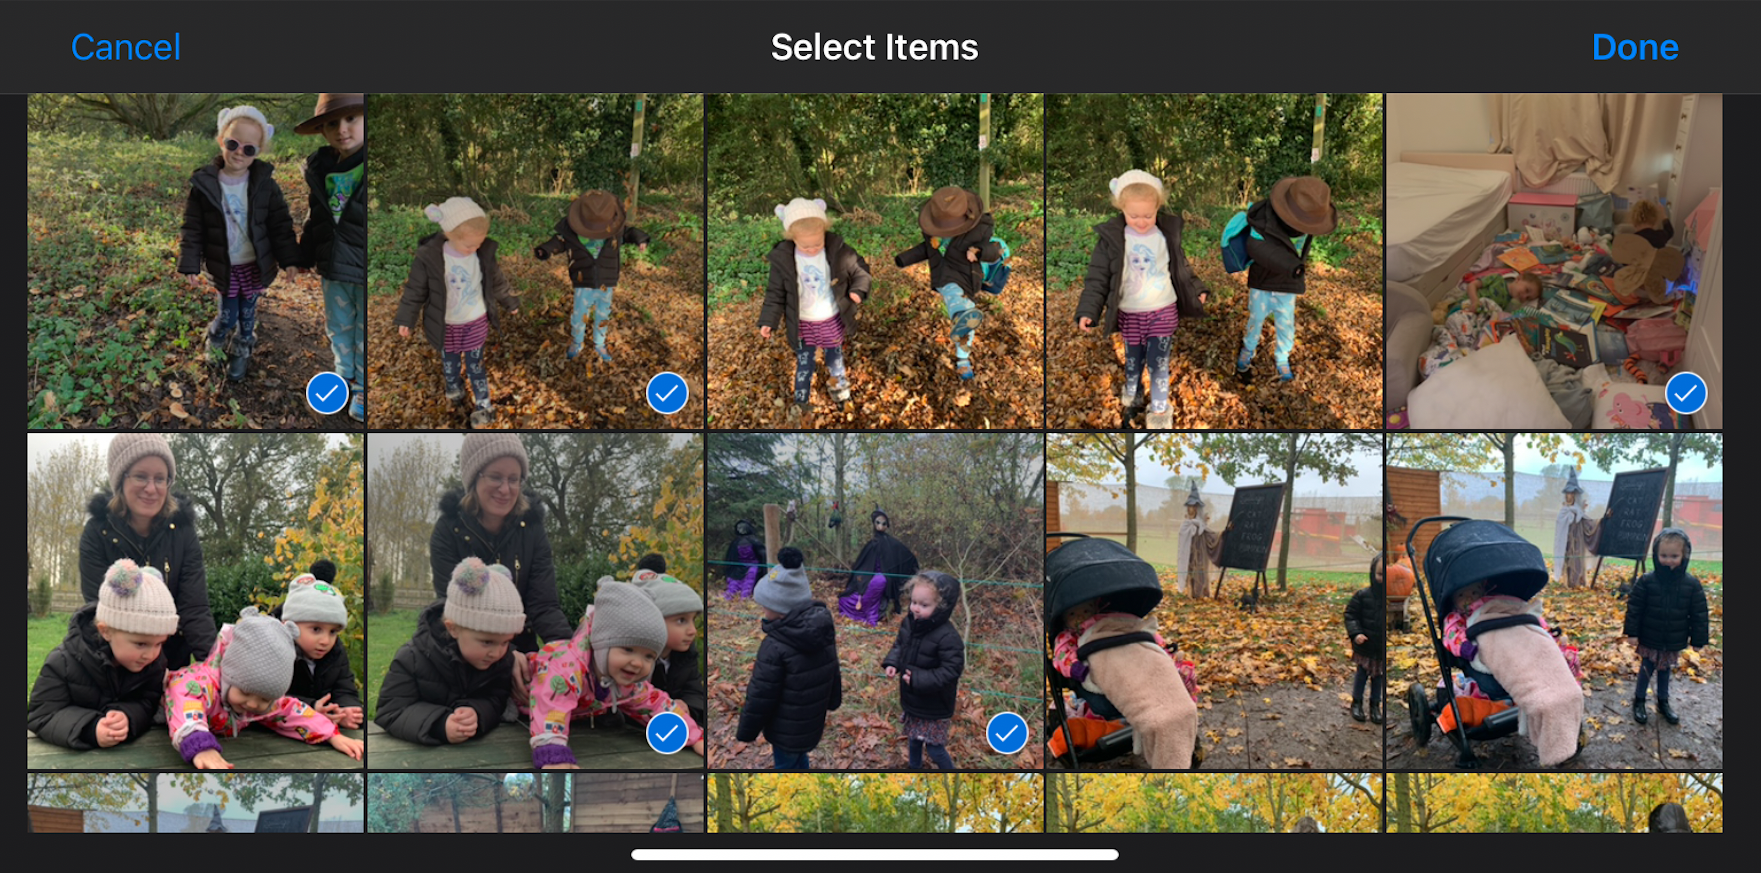
- To see all the images and photos in the album tap on the + and on the next screen you will see which photos and videos are selected and which aren’t. Assuming you wish to use them all, select all the items here and tap Done.
- If you felt that the video clips shown in the Memory needed some further editing you can do so in the Edit view. Swipe to the piece of video you wish to edit and slide the yellow markers to the beginning and end of the clip.
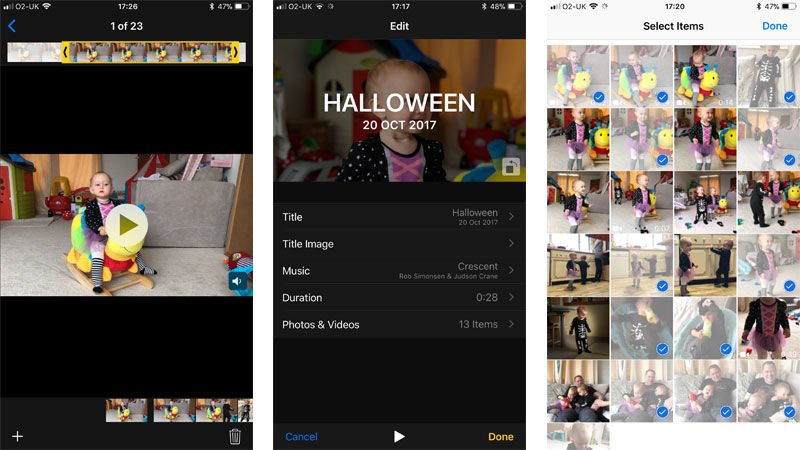
- You can flick through all the video clips and photos in this view and if you decide you want to remove any, just tap on the bin. Be careful not to accidentally delete something because if you want to add it again will lose what you have already edited!
- Once you have finished editing, tap the < in the top left to go back to the Edit screen.
- If you felt that the music wasn’t really in keeping with your video montage, tap on Music. You will be able to choose from various Soundtracks that Apple provides (these are surprisingly good), your own music collection, or None (if you don’t want music to be included). We’d recommend having a look at the Soundtracks on offer, so tap on Soundtracks.b
- Here you will see a long list of Soundtracks you can choose from. The brilliant thing about using these is that they will play on for as long as your Memory, without cutting off suddenly. They are sorted into genres too, so it’s easy to find something that should fit with your montage. Some will need to be downloaded. You won’t have to pay for any of them.
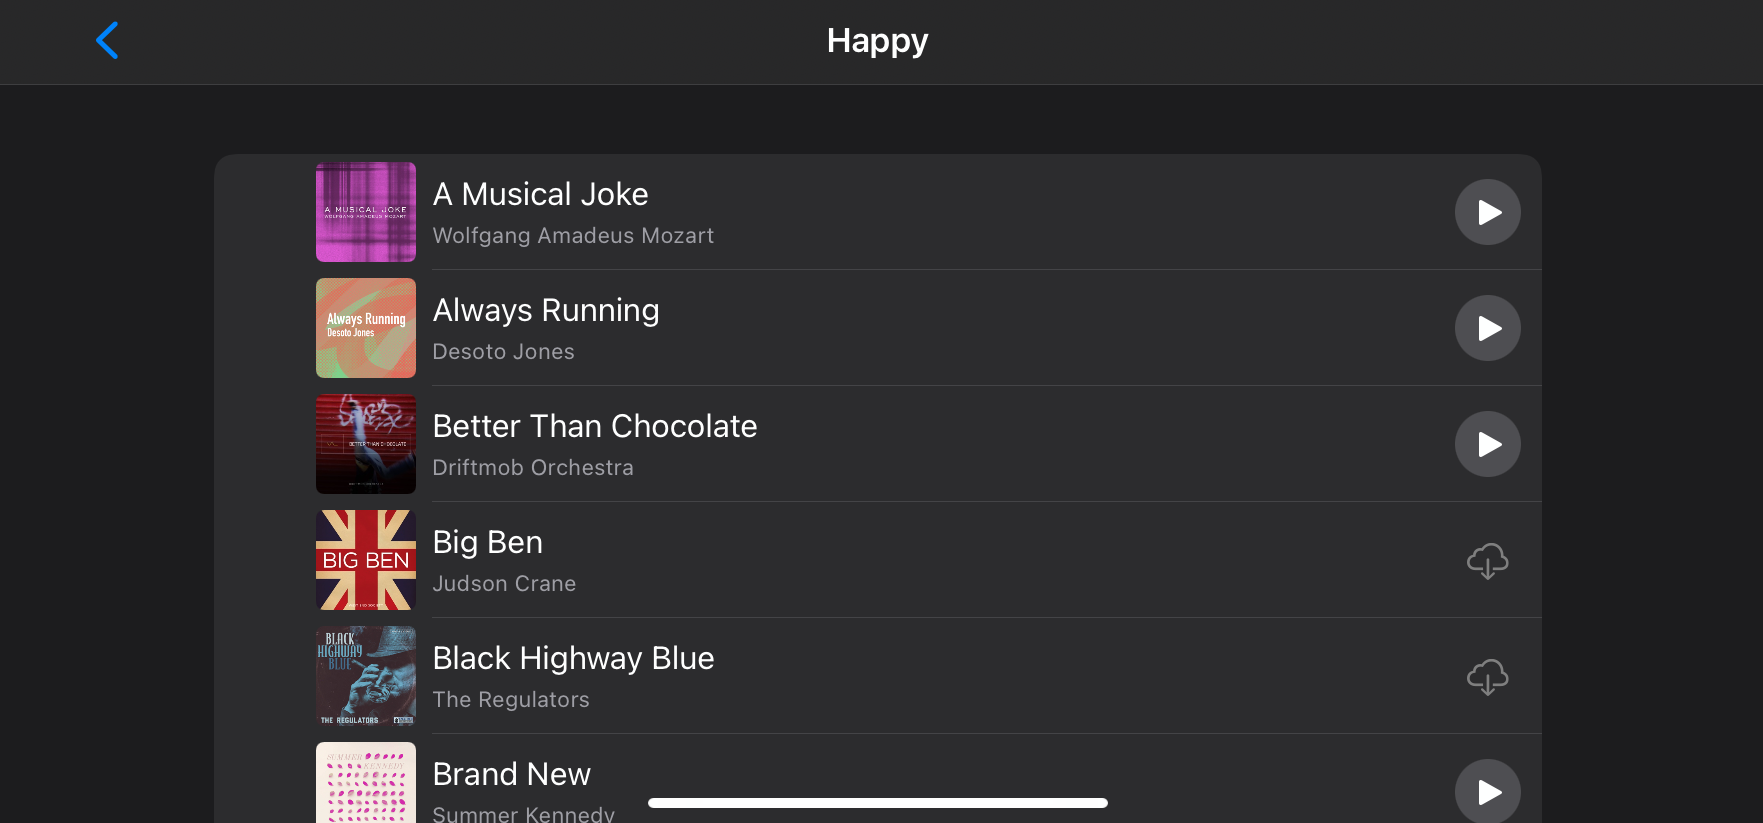
- Tap on a Soundtrack to listen to it while it downloads. If you decide on another then tap on that, give it a listen and tap on it if you decide that’s the one. Tap on the < again to go back to the Edit screen.
- If you wanted to change the title of your video, or the Title Style, then tap on Title. You can edit the words on the next screen and choose the font and size of the title from a selection here.
- Finally, you can see how the montage will look if you view it in Portrait or Landscape mode – the phone will automatically switch the view depending on how you hold your phone. So if until now you have been viewing the video in portrait rather than landscape, this is where to see what it would look like in landscape. Our only criticism is it’s either or, you can’t choose to show some photos and video in landscape and others in portrait.
- Now you have finished editing, tap on Done. Tap on the play button to view your masterpiece.
- If you are ready to share your video tap on the Share icon (the one with the arrow coming out of a box). Save Video is a good option if you want to save the final video montage in an easy to share format. You will see that your will display a dialog box stating that it is Exporting Movie. The finished movie can be found in Photos.
- Locate the movie in Photos (it will be the last thing added to All Photos). To share this to Facebook or similar tap on the Share icon again and choose your means of sharing.
Apple also makes an app called Clips, now in version 3. Here’s how to use Clips. And the iMovie app is also available for the iPhone and iPad – here’s How to use iMovie on iPhone.


Comments are closed, but trackbacks and pingbacks are open.